


HOW TO PLAY THREE KINGS WITH TABLETOP SIMULATOR
INTRODUCTION
Tabletop Simulator is a game developed by Berserk Games available on Steam. Though it is not free, it is affordable, widely played, and fully featured, making it an ideal way to play card and board games digitally and even has online multiplayer functionality, making it the perfect platform to create and play a custom card game. Truly, the only downside is that, unlike a fully featured and dedicated video card came, the version we would make in Tabletop Simulator will not do any calculations for you, and instead will require more player input. However, this is only a minor concern, as it is no different than playing physically in that regard.
OVERVIEW
Essentially, all we need to do in order to play the game is to create custom decks using cards from Three Kings. After that, the built in mechanics on Tabletop Simulator will allow you to play with those decks however you like, therefore the process to getting up and running will be very straightforward. However, there are a few things to keep in mind.
There is a difference between the process of creating a new deck template and simply importing a premade deck. This guide will focus primarily on the latter, but will touch on the first as well. However, because that is (only slightly) more complex, I have provided downloads for deck presets that allow you to bypass that process if desired. Also, Mixing decks is possible in Tabletop Simulator as well, allowing you to customize a deck using my given presets, as well, without needing to make your own external preset.
CREATING A NEW DECK
As you will have likely already noticed by observing the download files above, the deck presets come in the form of deck sheets as an image file. Tabletop Simulator will read this image and then cut it up into individual cards so long as you assign the correct number of rows and columns, allowing it to read it properly.
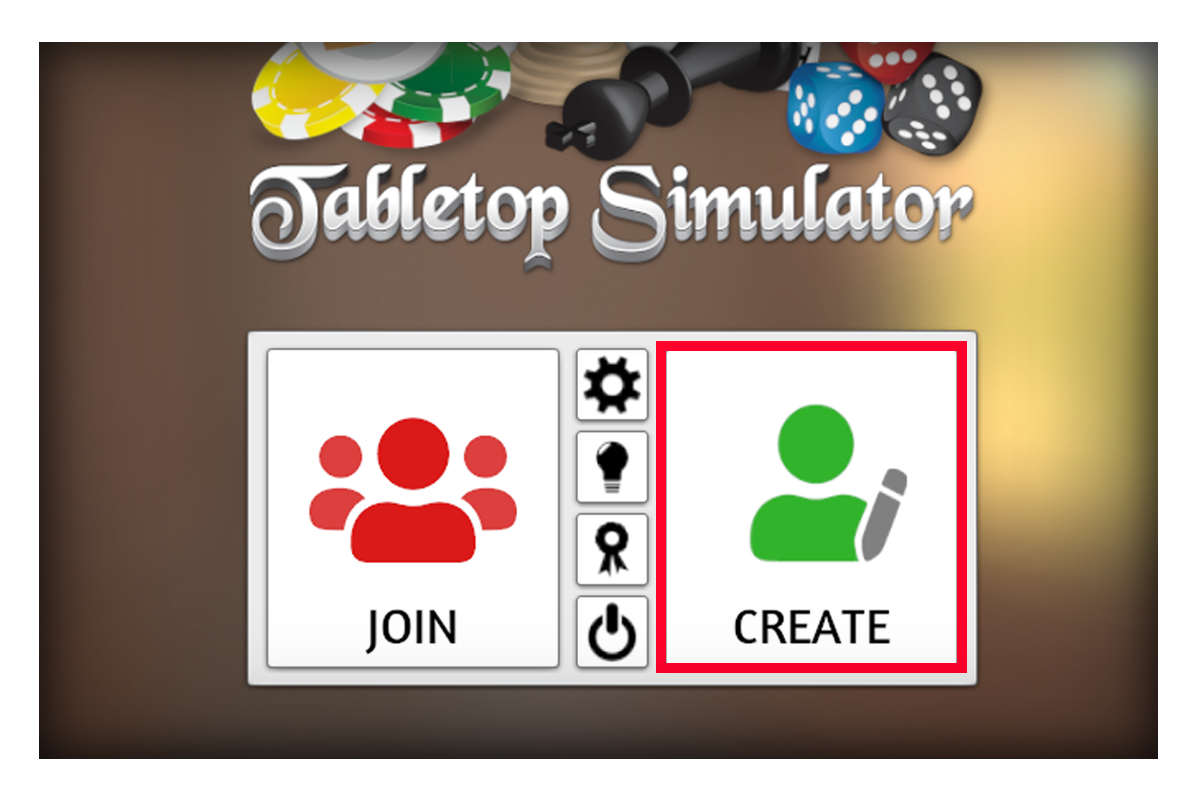
The first step will be to load a new game in Tabletop Simulator. The game will then prompt you to select either a single player or multiplayer game. Multiplayer will be required to play with a friend, though it does not matter at this point, as you can save a single player game and then invite a player to it later as well. So either option is okay for now.
Once you have entered the game you will be placed in the scene with the table and in-game options available. You will be able to change the table, adjust the lighting, and do other things to make the game comfortable for you. My personal preference is a scene with a small square table and simple lighting, but the choice is ultimately yours in that regard.
Now, in order to add a new deck, click on “Objects” at the top of the screen and then select “Components” from the new menu that pops up.
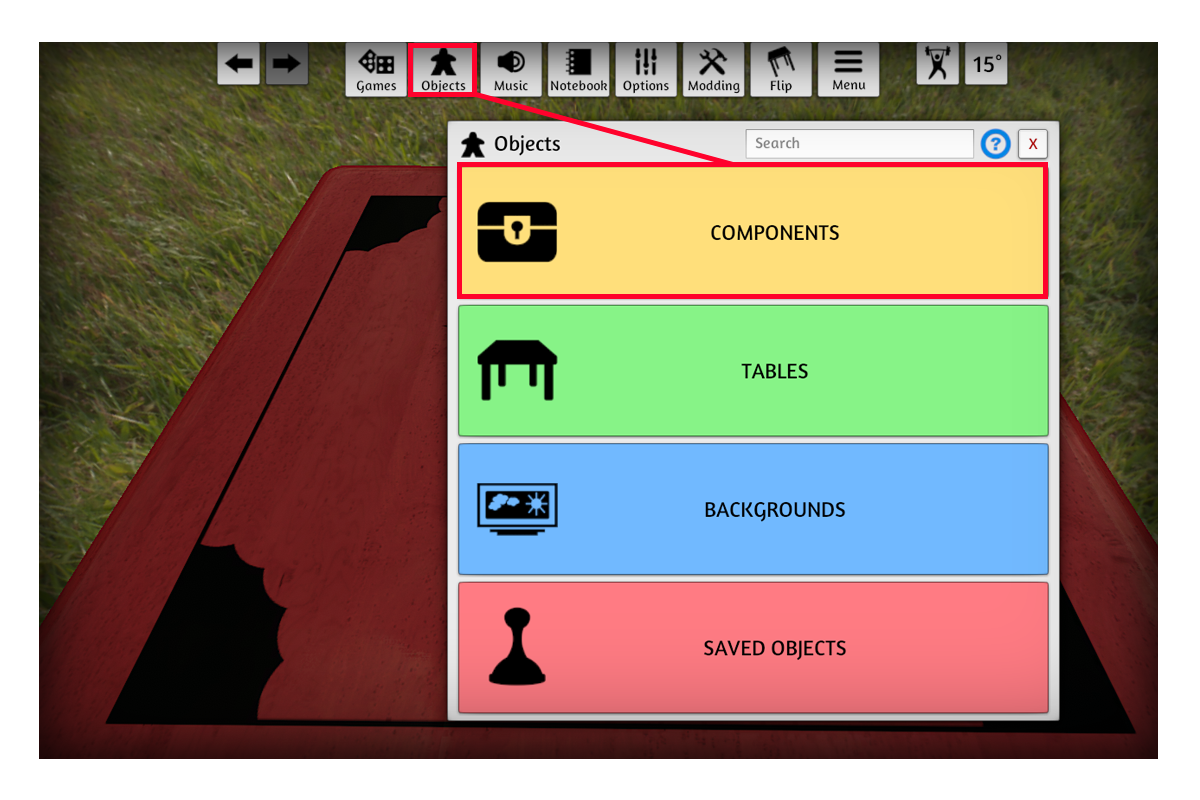
From there, select “Cards” and then “Custom Deck”.
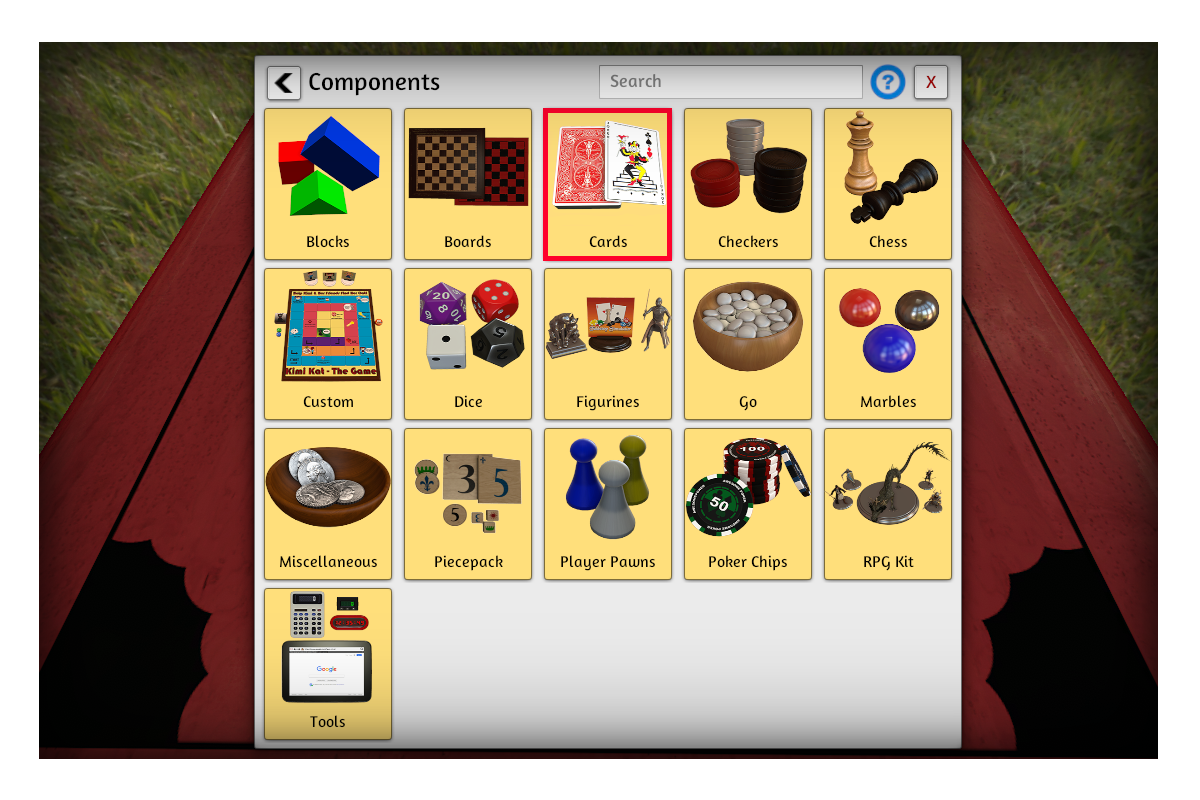
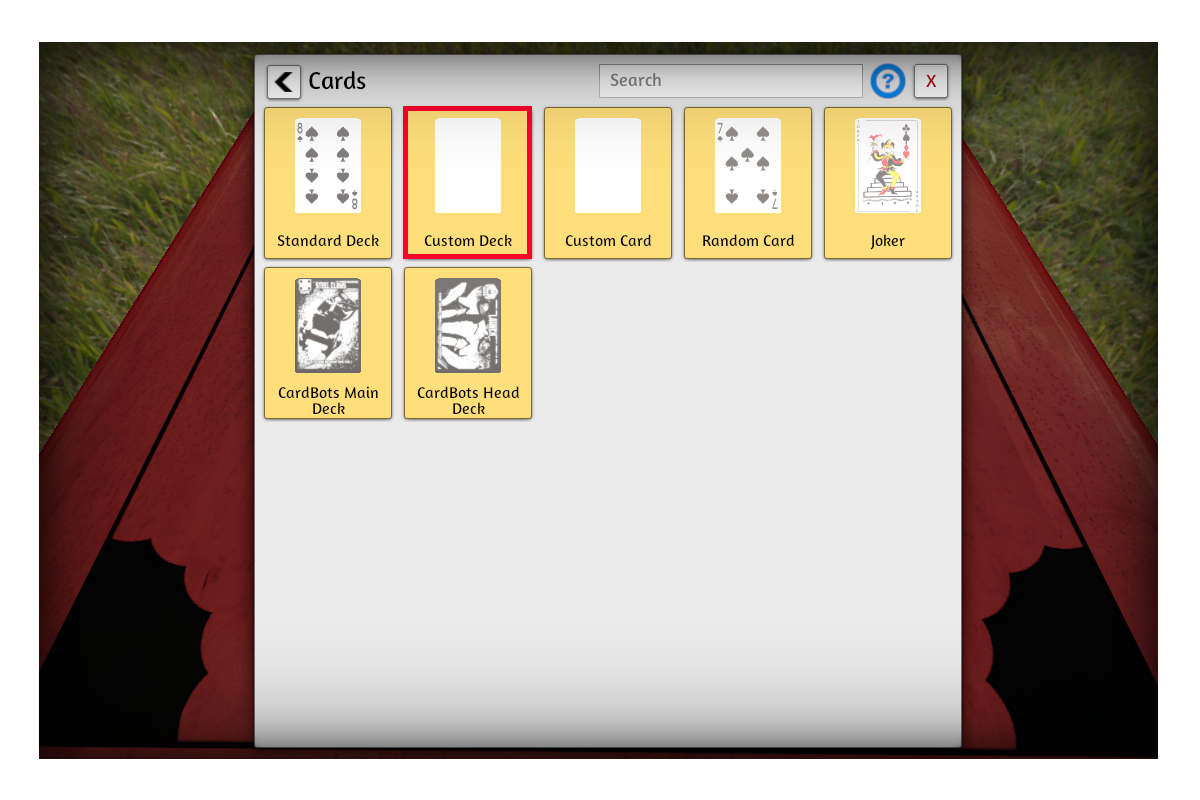
Once you select the “Custom Deck” option you will need to place it in the game. To do so, simply left click the table and the deck will spawn into the world in the place you’ve selected.
After the deck is spawned in, you will then need to right click anywhere in order to bring up the menu
The “Custom Deck” menus options are as follows:
Type: Describes the shape of the card. Select “Rectangle (Rounded).
Face: The image file from with the front of each card will be drawn.
Unique Backs: Enables different backs for each card.
Width: The total cards present in each row of the face image.
Height: The total cards present in each column of the face image.
Number: The total number of cards in the deck.
The last two options are irrelevant for our purposes. Hover over the (?) in the menu to see the further details on all options.
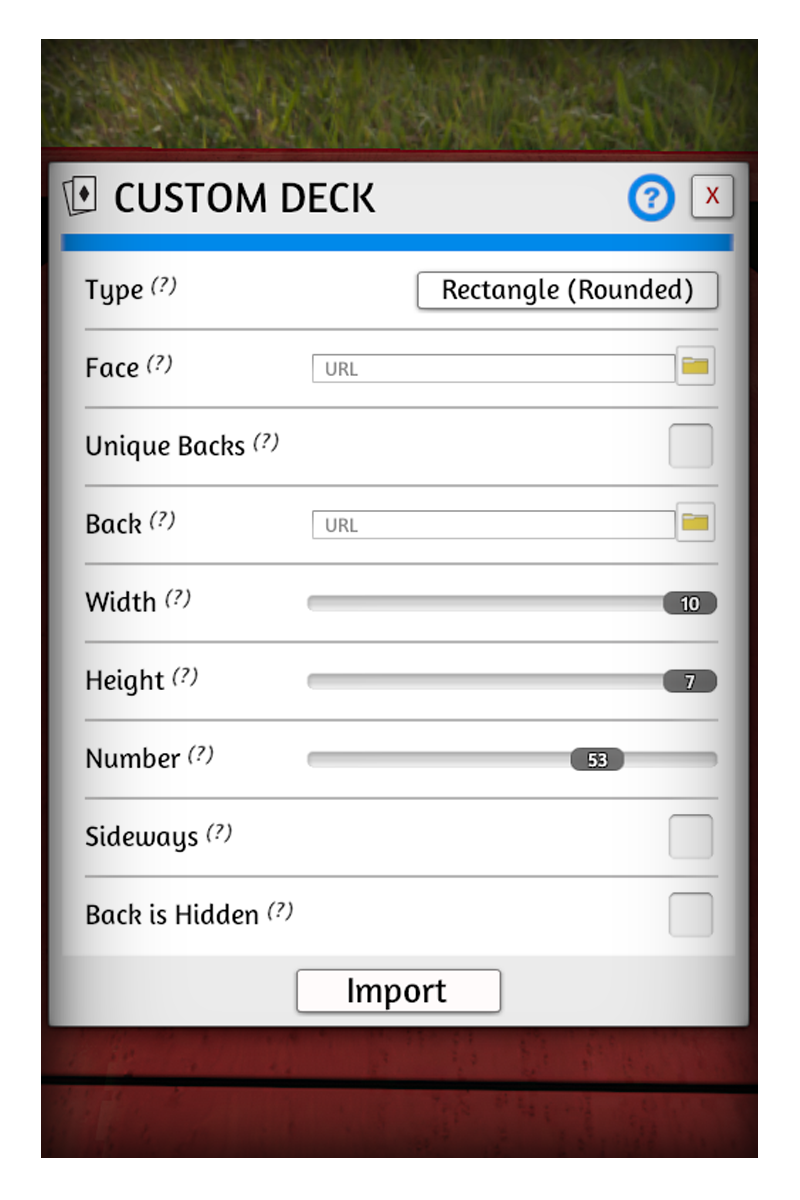
Upload the chosen deck preset image to the “Face” section by clicking the image of the folder.
Set the width to 9 and the height to 7 to match the preset, and then set the number of cards to 60. This will allow the game to properly draw each card in the deck, but only for the front. Given that each card back will be identical, you need only upload the “cardback.png” file from the download set and upload it to “Back” option by selecting the folder to the right.
Once all of this is complete, click “Import” and the deck will be generated.
Follow this same process again to create additional decks for you and your opponents to use and then simply spawn in black and white dice in accordance with the rules via the game’s object menu and you can now begin playing. As soon as you invite a friend to play with you, of course. The steps for which will be outlined below.